

Reclaimed tiles have become a popular choice for home improvement enthusiasts. These tiles not only add character and history to a space but are also an eco-friendly option. If you’re looking to start a DIY project, this guide will help you explore the best projects that are both beginner-friendly and rewarding. The unique patterns and textures of these tiles can transform ordinary spaces into extraordinary ones.
1. Mosaic Garden Stepping Stones

Mosaic garden stepping stones are a great introduction to working with reclaimed tiles. They allow you to get creative with patterns and colors without the pressure of perfection. This project is ideal for adding a personal touch to your garden while experimenting with different tile arrangements. You can use a variety of colors and shapes to create stunning designs that reflect your style. Plus, these stepping stones make wonderful gifts for friends and family.
Materials Needed
- Reclaimed tiles
- Concrete stepping stone molds
- Adhesive
- Grout
- Sealer
Steps to Follow
- Break the tiles into smaller pieces.
- Arrange the pieces in the mold to create your desired pattern.
- Apply adhesive to fix the tiles in place.
- Fill the gaps with grout and let it dry.
- Seal the finished stepping stone to protect it from the elements.
2. Kitchen Backsplash
A reclaimed tile backsplash can transform your kitchen, adding a rustic charm and a unique aesthetic. The variety of colors and textures available in reclaimed tiles can match any kitchen decor. Additionally, a backsplash protects your walls from spills and splashes, making it both a practical and stylish upgrade.
Materials Needed
- Reclaimed tiles
- Tile adhesive
- Grout
- Sealer
- Tile cutter
Steps to Follow
- Clean and prepare the wall surface.
- Apply adhesive and place the tiles in your desired pattern.
- Fill the gaps with grout once the adhesive is dry.
- Seal the tiles to prevent staining and damage.
3. Accent Wall
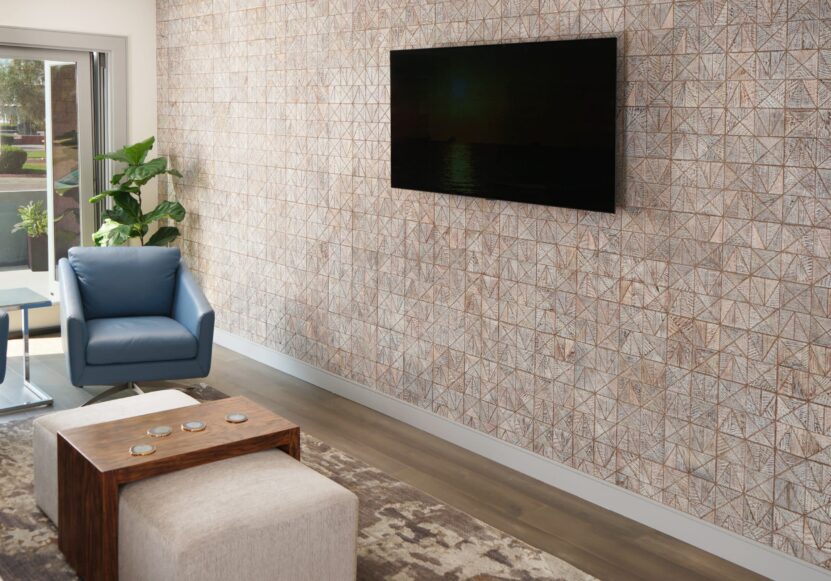
Source: indoteakdesign.com
Creating an accent wall with reclaimed tiles is a bold way to make a statement in any room. It’s perfect for beginners looking for a slightly larger project. An accent wall can instantly elevate the look of your space, making it more interesting and dynamic. You can choose from various patterns and designs to suit your style, whether it’s modern, rustic, or eclectic. Plus, it’s a great way to use up any leftover tiles from other projects.
Materials Needed
- Reclaimed tiles
- Tile adhesive
- Grout
- Sealer
- Tile cutter
Steps to Follow
- Choose the wall you want to accent and prepare the surface.
- Arrange your tiles in a pattern on the floor first to visualize the final look.
- Apply adhesive and start placing the tiles on the wall.
- Grout the gaps once the adhesive has set.
- Seal the tiles for longevity.
4. Tabletop Revamp
Updating an old table with reclaimed tiles can give it a new lease on life. It’s a manageable project for beginners and adds a unique touch to your furniture. This project is perfect for transforming a plain or worn-out table into a beautiful centerpiece.
Materials Needed
- Reclaimed tiles
- Tile adhesive
- Grout
- Sealer
- Tile cutter
Steps to Follow
- Clean and sand the tabletop surface.
- Arrange the tiles on the table to plan your design.
- Apply adhesive and place the tiles.
- Grout the gaps and let it dry.
- Seal the tiles to protect them.
5. Bathroom Floor Upgrade
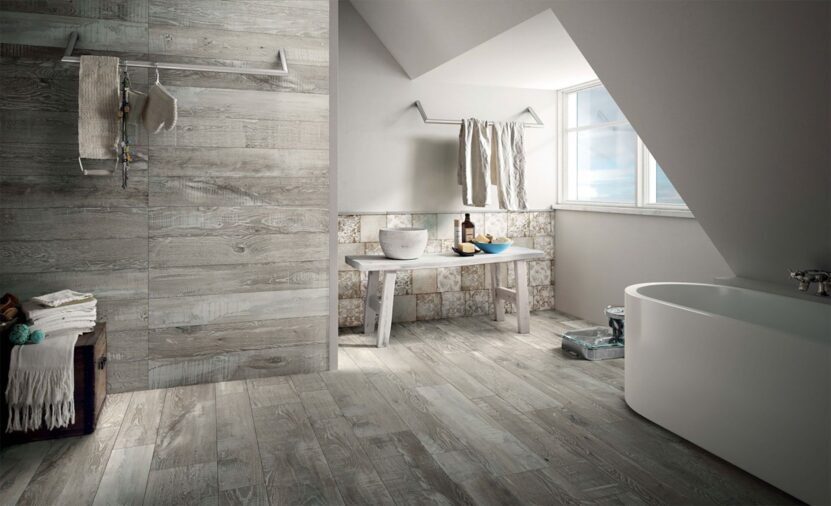
Source: pinnaxis.com
A reclaimed tile floor in the bathroom can add warmth and character. It’s a practical project that improves the look and feel of your space.
Materials Needed
- Reclaimed tiles
- Tile adhesive
- Grout
- Sealer
- Tile cutter
Steps to Follow
- Remove the existing flooring and prepare the surface.
- Apply adhesive and lay the tiles.
- Fill the gaps with grout once the tiles are set.
- Seal the floor to prevent water damage.
6. Outdoor Patio
Using reclaimed tiles for an outdoor patio creates a charming and inviting space. This project can turn your patio into a focal point of your garden.
Materials Needed
- Reclaimed tiles
- Concrete
- Tile adhesive
- Grout
- Sealer
Steps to Follow
- Prepare the patio surface by ensuring it’s level and clean.
- Lay the tiles in your desired pattern.
- Apply adhesive to secure the tiles.
- Grout the gaps and allow it to dry.
- Seal the tiles to protect them from weather conditions.
7. Fireplace Surround
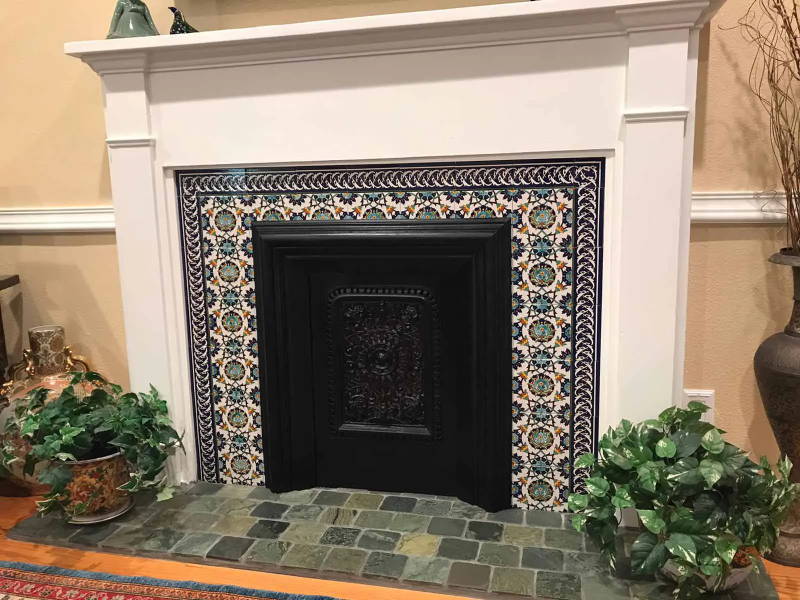
Source: jerusalempottery.biz
Enhancing your fireplace with reclaimed tiles can make it the centerpiece of your living room. It’s a simple project that has a big impact.
Materials Needed
- Reclaimed tiles
- Tile adhesive
- Grout
- Sealer
- Tile cutter
Steps to Follow
- Clean the fireplace surround area.
- Arrange your tiles in a pattern you like.
- Apply adhesive and place the tiles.
- Grout the gaps after the adhesive sets.
- Seal the tiles for durability.
8. Plant Pots Decoration
Decorating plant pots with reclaimed tiles adds a personalized touch to your garden or home décor. It’s a quick and easy project for beginners.
Materials Needed
- Reclaimed tiles
- Tile adhesive
- Grout
- Sealer
Steps to Follow
- Clean the plant pots.
- Break the tiles into small pieces.
- Apply adhesive and place the tile pieces on the pots.
- Grout the gaps and let it dry.
- Seal the tiles to protect them.
9. Shower Niche
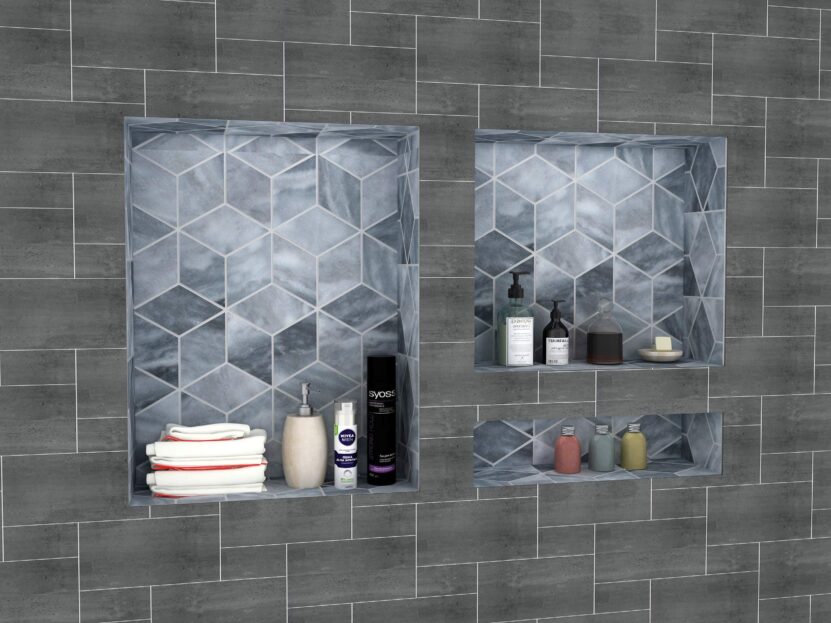
Source: amazon.com
A tiled shower niche not only looks great but is also practical for storage. Using reclaimed tiles can add a vintage touch to your bathroom. This project can be completed in a day and provides additional storage for toiletries. The unique patterns and colors of reclaimed tiles can make the niche a focal point in your shower. It’s a simple way to add functionality and style to your bathroom.
Materials Needed
- Reclaimed tiles
- Tile adhesive
- Grout
- Sealer
- Tile cutter
Steps to Follow
- Measure and prepare the niche area.
- Arrange the tiles to fit the niche.
- Apply adhesive and place the tiles.
- Grout the gaps once the adhesive sets.
- Seal the tiles to prevent water damage.
10. Entryway Floor
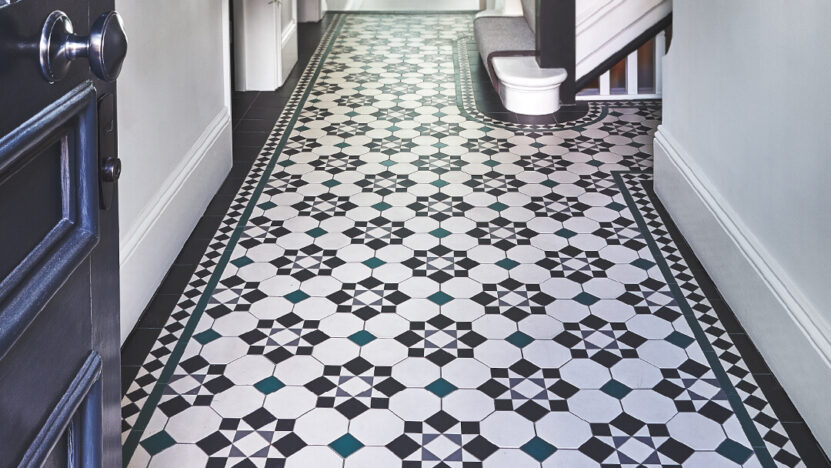
Source: londonmosaic.com
Tiling your entryway with reclaimed tiles creates a welcoming and unique entrance to your home. It’s a rewarding project that makes a lasting impression.
Materials Needed
- Reclaimed tiles
- Tile adhesive
- Grout
- Sealer
- Tile cutter
Steps to Follow
- Remove the existing flooring and prepare the surface.
- Plan your tile layout.
- Apply adhesive and lay the tiles.
- Grout the gaps once the tiles are set.
- Seal the tiles for durability.
In Summary
Reclaimed tile projects offer a unique and eco-friendly way to enhance your living space. These beginner-friendly projects not only allow you to get creative but also add a personal touch to your home.