
Are you struggling to achieve the vivid, high-resolution results you envision in your glass screen printing projects? Consider yourself lucky.
This comprehensive guide will equip you with five essential tips to elevate your print quality and let your creativity shine.
The Basics of Glass Screen Printing
Take a step back and consider the blueprint of your craft. Absorb the fundamental principles of screen printing – it’s akin to learning a language. Once you’ve got a handle on the syntax and grammar, eloquent sentences – or in this case, stunning prints – will flow naturally. Screen printing requires patience and practice to master the intricacies. Don’t expect perfect results immediately – be willing to experiment and learn from your mistakes. With persistence, you’ll gain fluency in the language of screen printing.
Screen printing on glass, at its core, is an intricate dance of ink, screen, and squeegee. Pressing ink through a mesh screen onto the glass creates a vibrant design layer. Mastering the choreography of the process takes time and experience. Focus on learning one step at a time rather than expecting immediate mastery.
Equipment? You’ll need a sturdy frame with a tightly woven mesh, a well-made squeegee, your desired ink, and a glass canvas for your masterpiece. Every item in your toolkit has a specific purpose – a purpose that contributes to the creation of a print that leaps off the glass. Please don’t underestimate the importance of these components; they’re the building blocks of your art.
Get acquainted with each tool and understand its role in the process, and you’ll be one step closer to mastering the art of high-resolution glass screen printing. Check out Norman’s Printery for all your essential tools.
Choose the Right Screen Mesh for Your Design
Mesh selection is a make-or-break factor in screen printing. The screen mesh, the fabric stretched across your frame, is a grid through which your ink will pass onto the glass. It’s not a one-size-fits-all situation; varying mesh sizes influence the detail of your design and the ink coverage.
Imagine the mesh as a honeycomb. Smaller cells (or, in our case, a higher mesh count) allow less honey (ink) to pass through but create more detailed prints. Conversely, a larger cell size (lower mesh count) is more generous with the honey, granting richer color saturation at the cost of some fine detail. Test a range of mesh counts to find the optimal balance for each design. Be prepared to do multiple tests to achieve your vision. With experimentation, you’ll unlock the mesh’s potential for stunning prints.
Hence, align your mesh choice with your design. Striving for a bold, solid-color design? A lower mesh count is your ally. Looking to captivate with intricate detail? Lean towards a higher mesh count. It’s a balancing act – but mastering this dance between design detail and ink coverage is a vital step toward high-resolution prints.
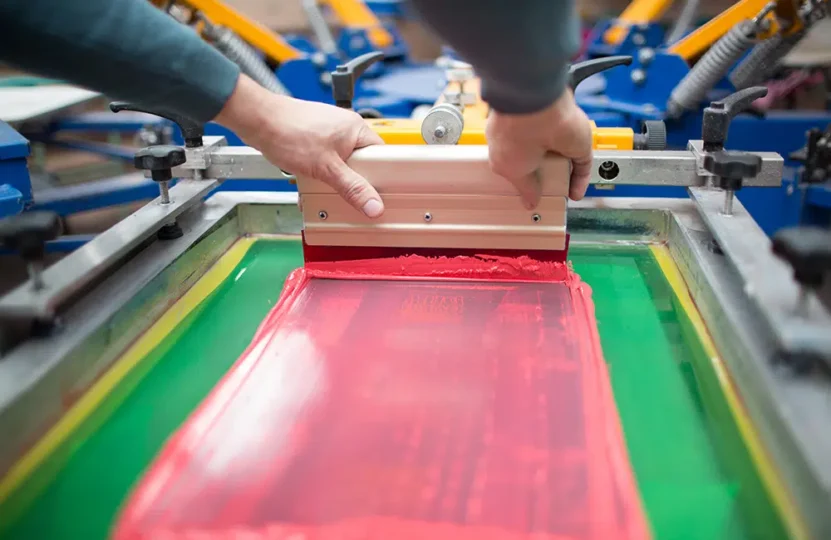
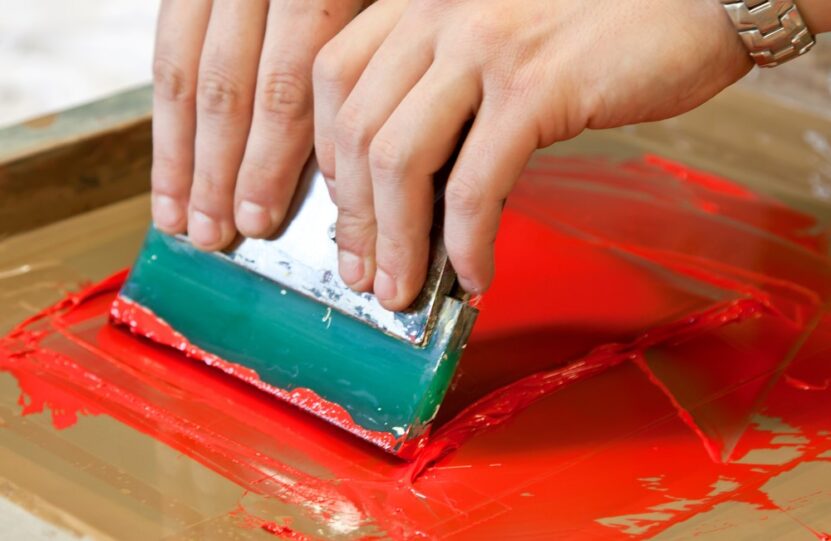
Master Your Squeegee Technique
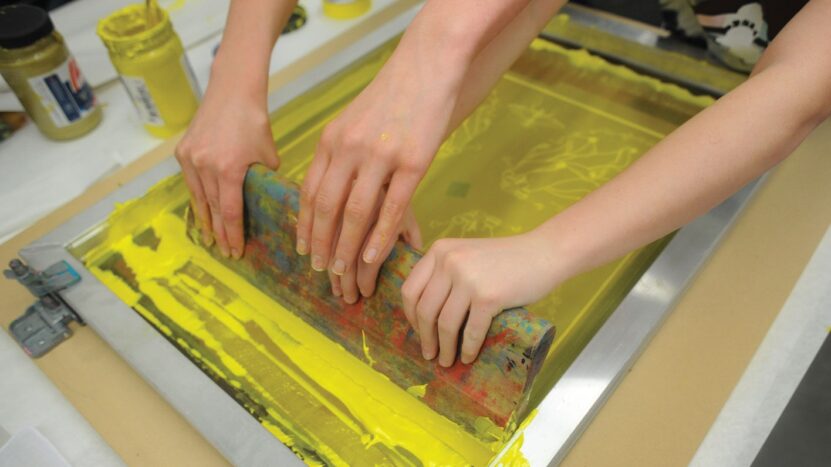
Your squeegee is your paintbrush; how you wield it will color your artwork. This unassuming tool has the power to make or break your print quality. Hold the squeegee at a 45-degree angle – it’s not a divining rod; it’s a maestro’s baton. Too upright and skimming the surface without a good ink deposit. Too flat, and you’re flooding your design with an ink deluge. Aim for a consistent angle and pressure as you draw the squeegee across your screen. Practice your squeegee technique repeatedly to develop muscle memory and skill. Don’t get frustrated if it feels awkward at first. With time, it will become second nature.
Here’s a pitfall to sidestep: inconsistent pressure. The print equivalent of mumbling it can render your design indistinct and lackluster. Instead, aim for a firm, even stroke – make every pull of your squeegee a decisive statement of your artistic intent. Strive to make each print a masterpiece by honing your squeegee consistency.
Remember, you’re in command of the squeegee, not the other way around. Own your squeegee technique and watch your screen-printing prowess flourish. Let the squeegee become an extension of your artistic vision.
Use High-Quality Inks Suited for Glass
Ink isn’t just color; it’s the very soul of your screen-printing masterpiece. Poor-quality ink or the wrong type can lead to disappointing results, like the flat soda of the art world. Don’t cut corners when selecting ink – use only the highest quality options designed specifically for glass. This is one area where spending more upfront is well worth the investment.
In glass screen printing, using inks specifically designed for glass is crucial. These inks adhere better and can withstand the test of time without fading or peeling. So, consider this a Golden Rule: always use glass-friendly inks. It’s like cooking with fresh, high-quality ingredients; your result is much better. Vet your ink thoroughly and read reviews to ensure it’s optimized for glass.
When shopping for ink, consider the desired finish and durability. Is your design destined for a dishwasher-safe wine glass or a decorative piece that will only be handled occasionally? The answer will guide your ink selection. Test ink durability to confirm it aligns with the end use.
Also, keep an eye on the viscosity. If it is thick enough, your ink will pass through the screen mesh smoothly. Too thin, and you’ll get a weak, washed-out print. Your aim is the Goldilocks viscosity—just right. Be prepared to tweak viscosity as needed to achieve ideal ink flow.
Lastly, take the time to mix your colors accurately for a consistent result. After all, a slightly off hue can make all the difference between a decent print and a breathtaking one. Remember, good ink leads to great prints. Precise color mixing is a vital skill to hone.
Optimize Your Exposure Time
Exposure time plays a decisive role in the creation of your stencil. Too little (underexposure), and the emulsion won’t harden enough, causing it to break down during washing. Result? A stencil as Swiss cheese as a colander. Too much (overexposure), and you’ll struggle to wash out the unexposed emulsion. It’s like trying to see through a fogged-up window; your design will lack sharpness and detail. Take your time with exposure – invest the time needed to perfect it. Keep detailed notes on your tests to streamline dialing in the ideal time.
To determine the optimal exposure time, conduct a simple step test. Gradually expose areas of a test screen to light, increasing the exposure time with each step. After developing the screen, compare the results. Look for the sweet spot where your design is clear, the unexposed areas have washed out well, and there’s no sign of emulsion breakdown. Run multiple-step tests to account for variables like emulsion batch and lamp age.
Remember, perfecting exposure time can take a bit of trial and error, like learning to whip up the perfect soufflé. But the high-resolution prints you’ll achieve will be worth every second of your time. View exposure tests as an investment in print quality. With practice, you’ll nail exposure time confidently.
So, my friend, the ball’s in your court. These tips hold a piece of the puzzle in pursuing high-resolution glass screen printing. Take them, experiment with them, master them. Remember, Rome wasn’t built in a day. Your perfect print won’t be either. But with time, patience, and a whole lot of practice, you’ll be producing prints that are the envy of the neighborhood.