
People often look upon their backyard as a place meant for resting and easing the mind, but things are much different when it comes to the driveway. Namely, the driveway needs to be functional but also look great, and this multipurpose is precisely why picking the right type of surface for the driveway is so important.
This is also why so many people tend to go with resin driveway surface – it looks great and is easy to repair, which is something we will further discuss.
Access the Damage
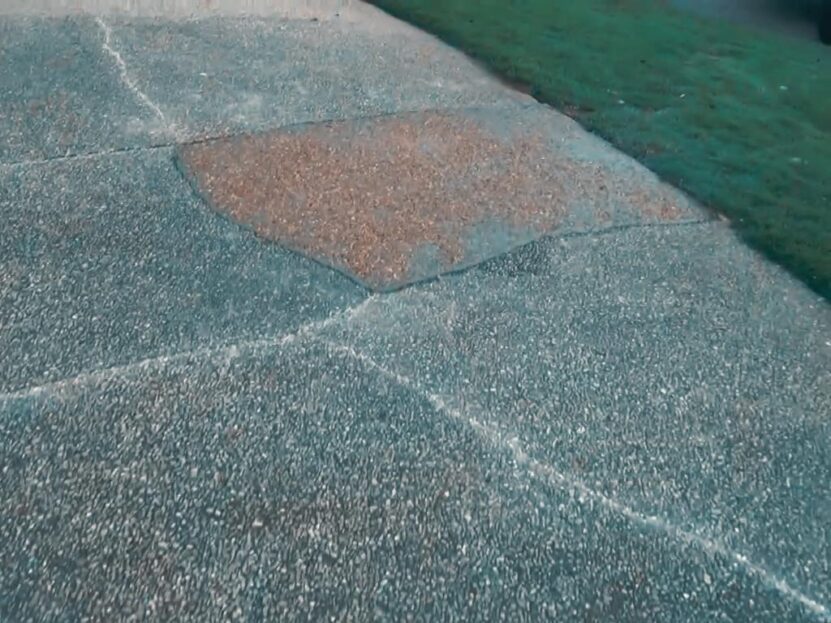
Repairing damage to the resin driveway is possible, and there are plenty of things that one can do in order to freshen up the looks of their driveway and make it new. Now, to be able to repair such damages, one first needs to check the damage because it is essential to know the cause of it.
This is of utmost importance as just repairing damage without dealing with the cause only means that after a certain time, you will have to do it again. So, to avoid all that, one needs to check the damage and see whether it occurred due to moisture, weed growth, loose stones, uneven surfaces, or because of oil spillage.
Different type of the cause of the resin driveway damage seeks different solutions, and once we have discovered what that is, we can focus on how to properly repair them. But before we start, it’s also important to have the right tools and resin driveway kits.
The good thing is that most of this work you can do on your own, and the only thing to think ahead of is picking the right DIY resin driveway kit – more on that you can find on this website.
Moisture Damages
Moisture can do so much damage to the resin driveway surface and is one of the things that can affect not just the looks of it but the quality and consistency of it as well. Namely, once moisture comes in contact with this type of driveway surface, the resin component will harden, which will leave a weakened bound surface.
One of the ways to deal with moisture is by applying the sealer, as it will provide more strength to the surface, leaving no room for moisture to cause damage. Of course, this is only optional in cases where moisture hasn’t already damaged the driveway surface to an extent that’s beyond repair.
Another tip is to sandblast any foaming that appears on the surface before you apply this sealer, as by doing so, you will deal with the cause and not just repair the damage. On the other hand, if the damage of the resin surface is extremely damaged, it’s always best to consult the experts, as they will provide answers and proper guidance on how to deal with this issue.
Worn Off Surface
After a certain time, everything starts to fade and lose its primary function, and the same is true with resin driveway surfaces. The first thing to clarify is that this is not a cause for panic because besides the fact this is pretty normal, repairing it is also something one can do on their own.
Once again, the sealer is a great way to enhance the looks and the consistency of the surface. The sealer will fill any possible gaps that might occur, even those that we cannot see, but it’s of utmost importance for the surface to be clean before we apply the sealer.
Removing dirt and any possible contaminants is a must before doing any kind of repairs. Only after a thorough cleaning process should one start picking the right type of sealer, and one of the types that proved to be the best is the UV-resistant resin sealer.
The Surface Is Slippery
One of the common issues with this type of surface is that after some time, it gets slippery. There are several reasons why this happens, but more often than not, it’s because of the dirt and contaminants. If this is the main issue with your resin driveway surface, the best-case scenario is to clean it and hope that this alone will do the trick.
But, more often than not, just cleaning the surface will not be enough, meaning that you will have to buy a different type of sealer to deal with this problem. There are several types of sealers for you to choose from, leaving you enough room to go with the one that suits your purpose and fits your home budget the most.
It’s all about the grip of the surface, and in case one has this problem with the resin surface they have just installed, then applying a sealer that grants more grip will do the trick. On the other hand, if the surface wasn’t slippery before, then the chances are high that this occurred due to the surface being warned out.
Applying the sealer might not be enough for this type of issue, as it all depends on the condition of the surface, whether there are also some cracks, spillage, or moisture.
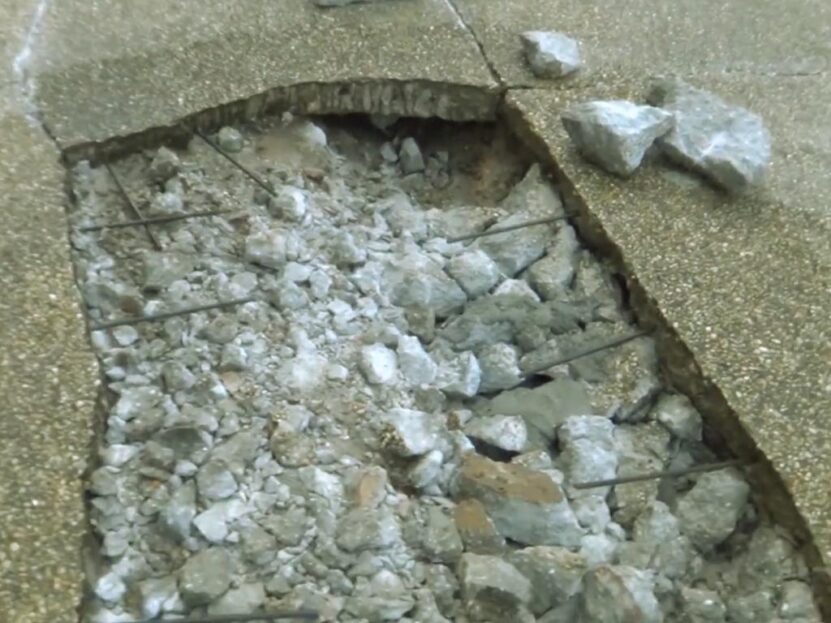
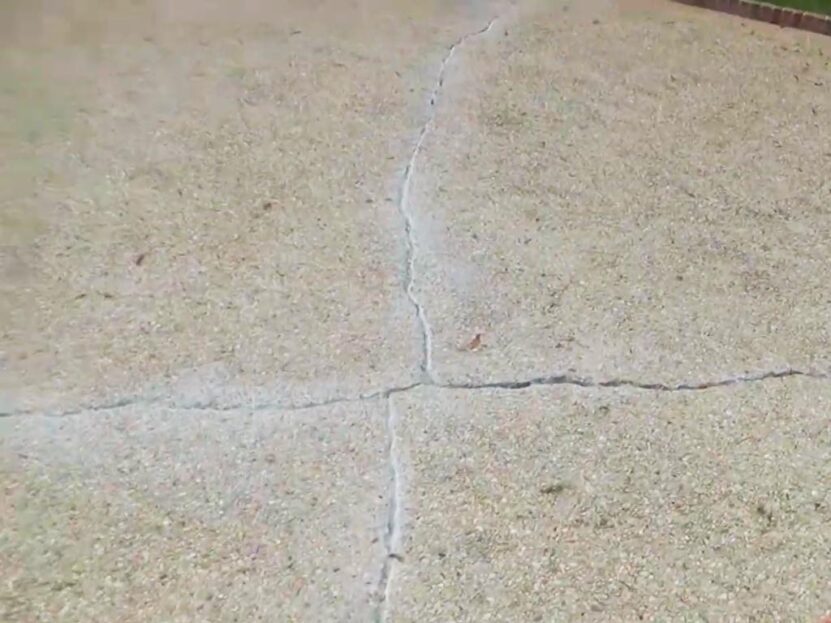
Uneven Surface
This is a problem that doesn’t happen that often and is something that needs to be carefully accessed and dealt with. Uneven and, in some cases, sinking surfaces can cause so much damage to the entire resin driveway surface, and if we don’t deal with this issue in time, it can be disastrous, and we might need to do everything from scratch. So, as soon as you notice this issue, make sure to deal with it in time.
The first step in dealing with uneven surfaces is to prepare the area by removing compromised material. The second step is cleaning the surface from any possible contaminants. Then, when everything is set, the third step is applying the binder, whose role is to strengthen the entire surface.
Afterward, it’s time to distribute the right type of aggregate, and the final fifth step is to use a trowel to blend and level the surface. After this type of ‘intervention,’ you shouldn’t experience any similar problems in the future.