

In the realm of sound management, acoustic panels play a pivotal role. They enhance sound quality by reducing unwanted echoes and reverberations in spaces such as home theaters, recording studios, and offices.
This article focuses on the effective hanging of acoustic panels, ensuring optimal sound.
Understanding Acoustic Panels
Acoustic panels come in various materials, including foam, fabric-wrapped fiberglass, and wood. They absorb sound waves, preventing them from bouncing off hard surfaces. The key lies in their porous and dense nature, which allows them to trap sound.
These do not completely soundproof a room but significantly improve sound quality within the space.
Tools and Materials Needed
Before beginning the installation process, gather all necessary tools and materials. This includes the acoustic panels, a measuring tape, a level, a pencil, wall anchors, screws, a drill, and potentially adhesive, depending on the mounting method chosen.
Choosing the Right Location
The effectiveness of acoustic panels largely depends on their placement as explained by the experts from acousticpanels.co.uk. Identify areas where sound reflections are problematic, often revealed through a simple clap test.
Clap your hands in the room and listen for echoes. The areas where these echoes are most prominent are ideal for panel placement.
Preparing the Wall Surface
Ensure the wall surface is clean and dry before installation. Remove any debris or dust, as these can hinder the adhesion process if you’re using adhesive mounting. For screw mounting, locate the studs in the wall using a stud finder for secure attachment.
Mounting Techniques
There are two primary methods for mounting them: adhesive and mechanical. Adhesive mounting involves using glue or double-sided tape, suitable for lighter foam panels.
Mechanical mounting, using screws and wall anchors, is necessary for heavier panels like those made of fiberglass.
Adhesive Mounting Method
For adhesive mounting, apply the adhesive or double-sided tape to the back of the panel. Press the panel firmly against the wall for a few minutes to ensure a strong bond. Be cautious with the amount of adhesive used, as too much can damage the wall or the panel if removal is needed.
Mechanical Mounting Method
When using screws and anchors, mark the drilling points on the wall using a pencil. Ensure these points are level to keep them straight. Drill holes at the marked points, insert wall anchors, and then screw the panels into place. This method provides a more secure and permanent installation.
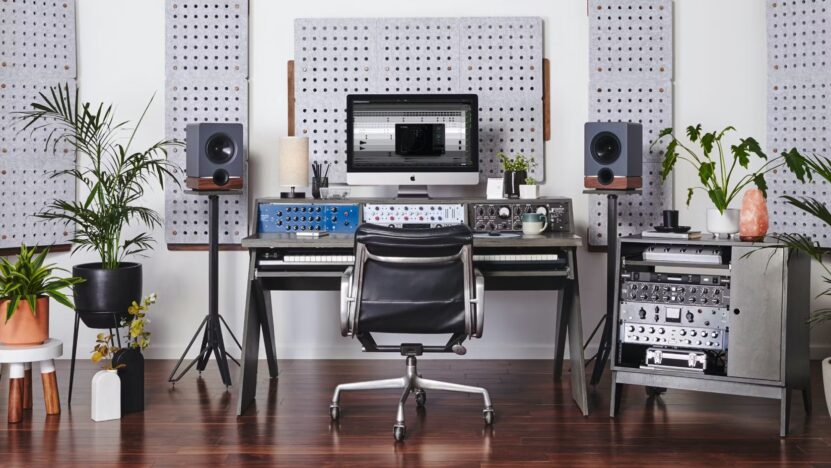
Panel Arrangement Tips
Optimizing the arrangement of them is crucial for sound quality. Arrange panels symmetrically to balance sound absorption across the room. Focus on first reflection points – areas directly opposite your speakers.
Stagger panels for a diffused sound effect. For aesthetics, consider a pattern or design that complements your room’s décor while maintaining functional placement.
Soundproofing Considerations
While they are not designed for soundproofing, they contribute to sound quality within a room. For soundproofing, consider adding mass-loaded vinyl, sealing gaps in doors and windows, and using insulation materials.
Remember, soundproofing involves preventing sound from entering or leaving a room, while acoustic panels manage sound within a space.
Custom Panel Design
Custom-designed acoustic panels offer both aesthetic and functional benefits. Tailor panels to your room’s specific acoustical needs and design preferences. Choose materials, sizes, and shapes that fit your space and enhance its overall appearance.
Custom designs can also target specific frequency ranges, allowing for a more precise acoustic treatment.
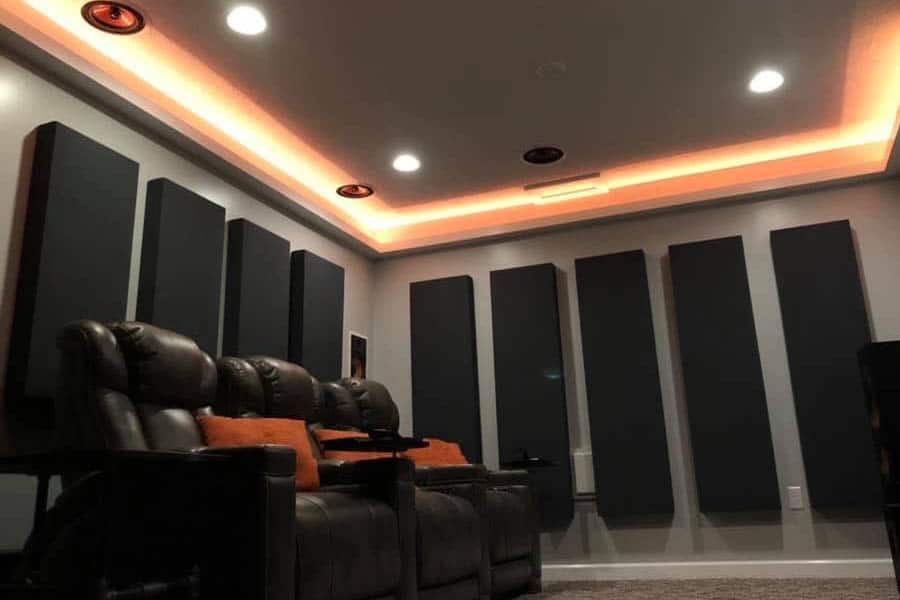
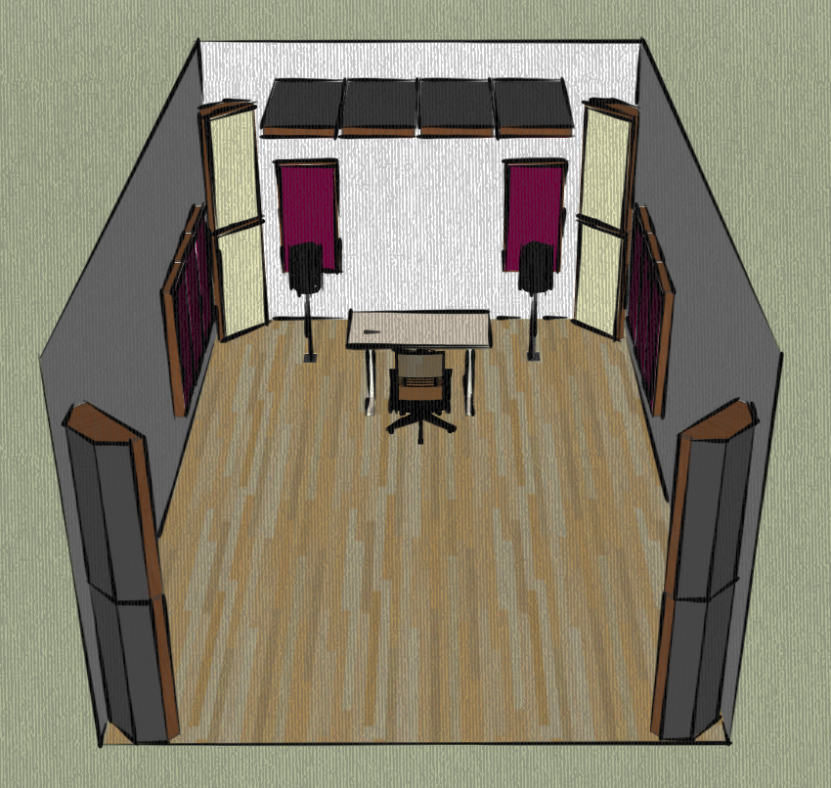
Acoustic Panel Placement Examples
For effective placement, consider areas like directly behind speakers, on the ceiling above the listening area, or on walls at ear level when seated.
In a home theater, place them at reflection points from the screen to the audience. In recording studios, focus on areas around microphones and instruments.
DIY vs. Professional Installation

DIY installation of acoustic panels can be a cost-effective and satisfying project for those with a knack for handiwork. It allows personal control over the process and can be a learning experience.
However, professional installation guarantees optimal placement and secure mounting, crucial for larger or more complex setups, where precision is key.
When deciding between DIY and professional services, consider your skill level, the complexity of the installation, the scale of the project, and whether specialized tools or knowledge are needed to ensure a successful and safe installation.
Budget Considerations
Budgeting for acoustic panels involves balancing quality and cost. Foam panels are generally more affordable but less durable, while fiberglass ones are pricier but more effective and long-lasting.
Consider the size of your space and the extent of treatment needed. Plan for potential professional installation costs if you’re not installing them by yourself.
Final Adjustments and Testing
After installation, step back and inspect the panels for uniformity and alignment. Make any necessary adjustments. Test the room’s acoustics again by clapping or playing music. You should notice a significant reduction in echoes and reverberations.
Maintenance and Care
Acoustic panels, known for their low maintenance needs, benefit from simple yet consistent care. Regular dusting, using a soft cloth or a duster, prevents dust accumulation, which can affect their sound absorption qualities over time.
Occasional vacuuming, with a soft brush attachment, helps maintain the integrity and appearance of the panels, especially for those with a more textured surface.
For fabric-covered panels, a lint roller is particularly effective for removing surface dust, pet hair, and other small particles that cling to the fabric.
Additionally, in environments prone to humidity, it’s important to check for any signs of moisture buildup or mold growth on the panels.
Conclusion

Installing acoustic panels is a straightforward process that can dramatically improve the sound quality of any space.
By choosing the right panels, determining their optimal placement, and using the appropriate mounting method, you can achieve a professional-level acoustic environment. Regular maintenance will ensure the longevity and effectiveness of the panels.
By following these steps, you can transform a room with poor acoustics into a space with clear, crisp sound, perfect for any audio-centric activity.